Love Disney but not sure how to carry that magic with you every day?
If you’ve ever dreamed of getting a tattoo that feels fun, personal, and full of childhood memories, a Disney-inspired design might be exactly what you’re looking for.
From tiny Mickey Mouse outlines to colorful scenes from your favorite movies, there’s something for everyone—whether it’s your first tattoo or your fifth.
In this guide, we’re sharing the 12 Disney Tattoo ideas that fans truly love. These tattoos are simple, meaningful, and easy to customize based on your style.
Whether you want something small and cute or bold and detailed, these ideas can help you bring your favorite Disney moment to life on your skin.
How To Create These Disney Tattoo Designs:
- Pick Your Character or Symbol: Choose based on personal connection or favorite movie. Keep in mind size and placement on your body.
- Choose the Style: Decide between minimal, cartoon, watercolor, blackwork, or realism. This sets the tone for your entire piece.
- Sketch the Layout: Start with pencil or digital drawing tools. Outline the main elements, then plan space for color or added symbols like stars or text.
- Refine the Details: Clean up lines, decide shading areas, and test color palettes. For watercolor, plan blending zones; for linework, ensure smooth curves and balance.
- Digitize for Your Artist: Scan or create a clean vector file to bring to your tattoo artist. Discuss adjustments to suit skin tone, placement, and ink longevity.
- Consult the Tattoo Artist: They’ll finalize proportions, suggest ink changes, and make the design skin-ready while preserving your original concept.
12 Cute Disney Tattoo Ideas
1. Mickey Mouse Outline
A classic choice, this minimal design features just the outline of Mickey’s iconic head and ears. To create it, use smooth, symmetrical circles for the head and ears. Keep line thickness consistent and placement versatile—wrist, ankle, or behind the ear.

2. Castle Silhouette with Fireworks
Capture the magic of Disney parks with a silhouette of Cinderella’s castle. Add small bursts of colorful fireworks in the background. Design it using black ink for the castle and watercolor effects or fine dotwork for the fireworks.

3. “Hakuna Matata” Phrase
This simple phrase from The Lion King carries deep meaning. Use a whimsical, cursive font or stylized script that echoes the playful tone of the film. You can frame it with small symbols like a sun, leaf, or paw print.

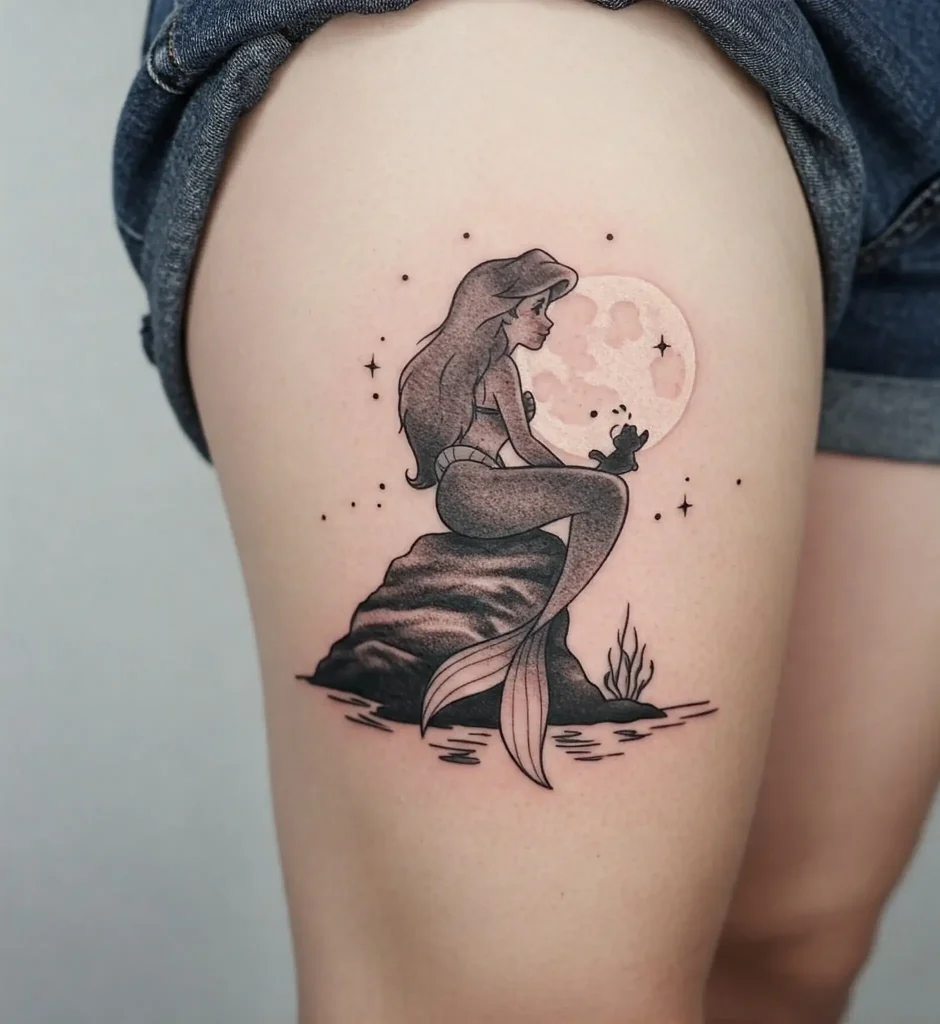
4. Ariel’s Silhouette on a Rock
From The Little Mermaid, this design shows Ariel sitting on a rock against a moonlit sky. Start with a clean outline for her form, then add gentle shading for depth. You can incorporate a soft, glowing moon in the background using white ink.
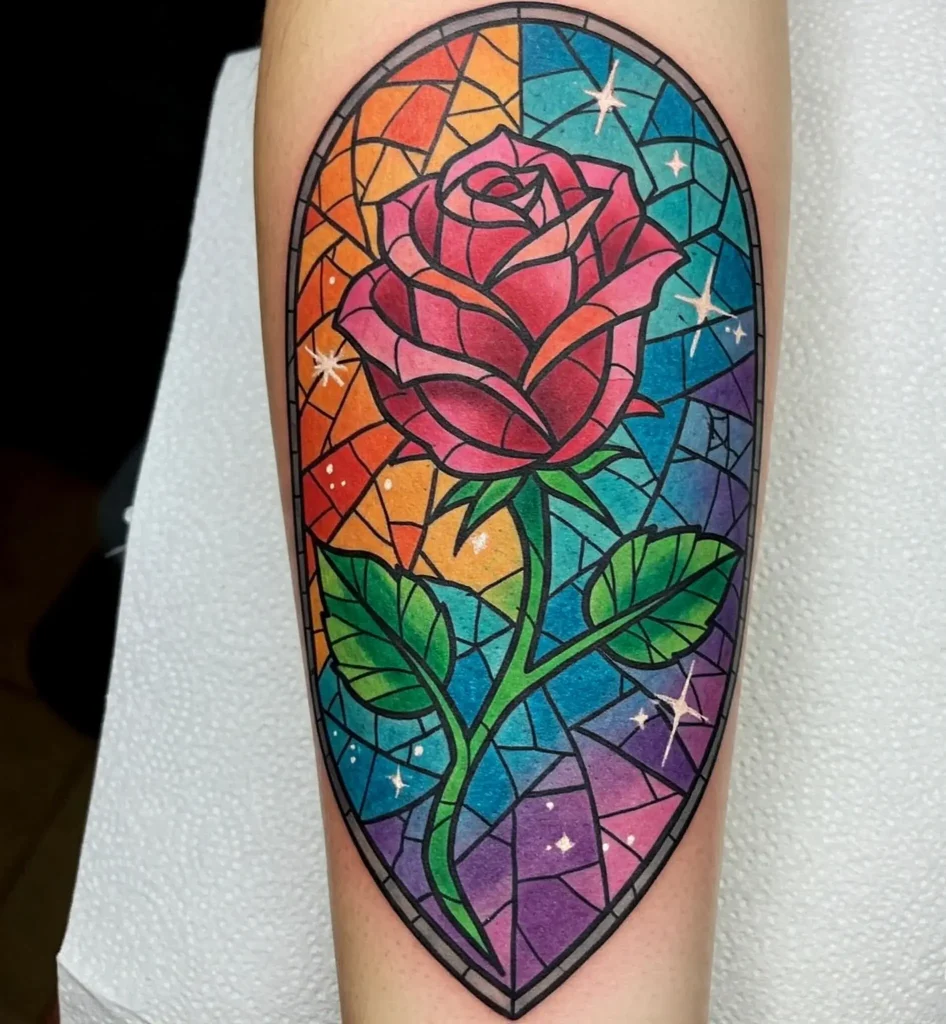
5. Stained Glass Beauty and the Beast Rose
Recreate the enchanted rose using a stained-glass style with bold black lines and rich, jewel-toned colors. Divide the rose and background into segments like real glass panels and color them with gradients for a magical effect.
6. Up Balloon House
Design the floating house with small, detailed linework and hundreds of colorful balloons. Each balloon can be a dot of watercolor ink for a light, floating feel. Add clouds or a blue wash to represent the sky.

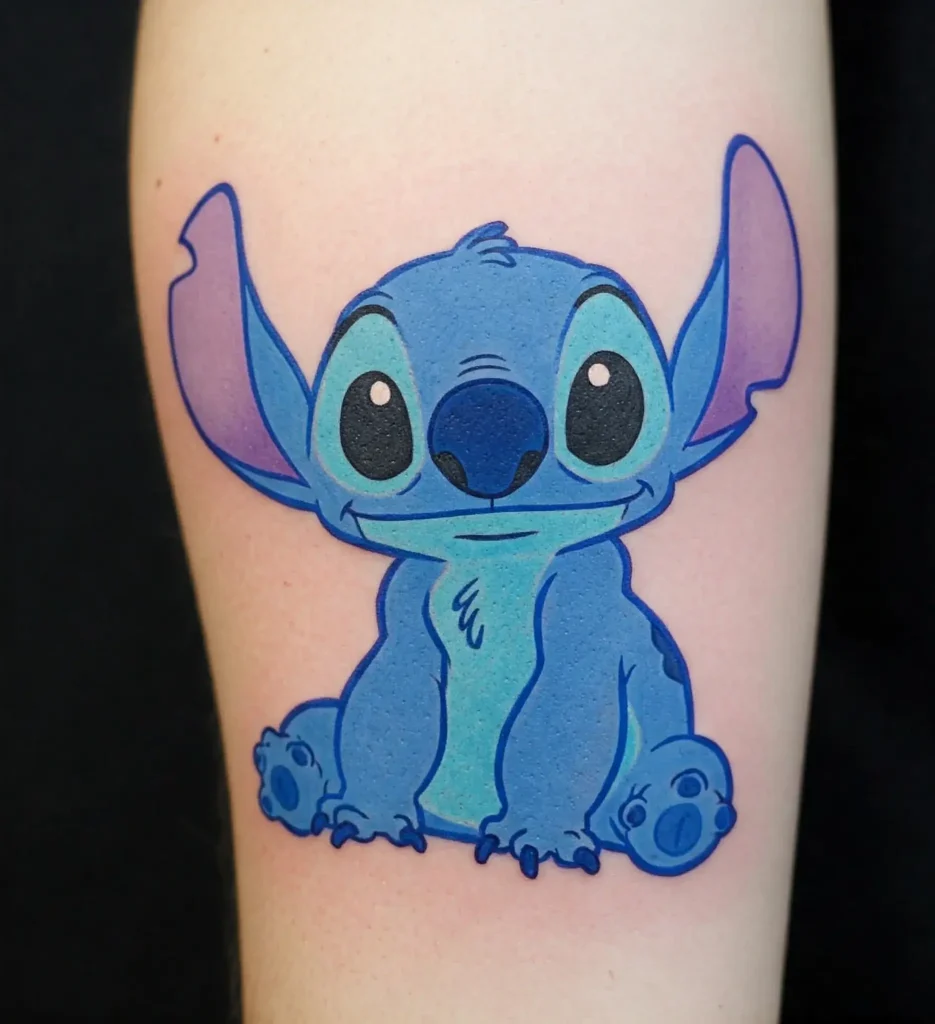
7. Stitch from Lilo & Stitch
Go for a playful, cartoon-style tattoo of Stitch in a mischievous pose. Use bright blue and purple shades, clean lines, and highlight his wide eyes and toothy smile to reflect his personality.
8. Tinker Bell with Sparkles
Draw a small, delicate Tinker Bell in flight with a trail of sparkles or fairy dust. Keep her wings semi-transparent with fine dot shading, and create a twinkling path using white and silver inks.

9. Winnie the Pooh and Friends Outline
Create a minimal tattoo featuring the outlines of Pooh, Piglet, Tigger, and Eeyore walking together. Arrange them in a line, like they’re on an adventure. Use soft lines and keep it monochrome or add light pastel tones.

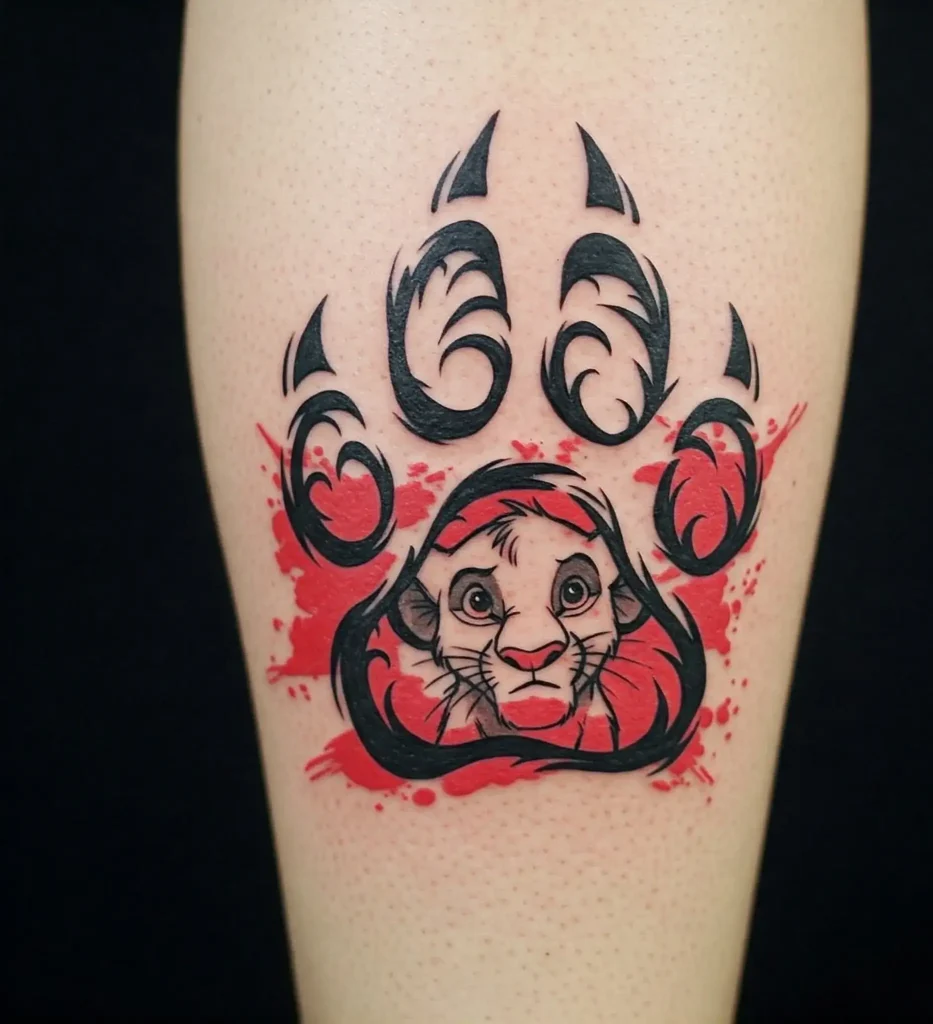
10. Simba’s Paw Print
Based on Rafiki’s drawing of Simba from The Lion King, this design looks tribal and bold. Recreate the paw using thick brush-like lines and add a smudge or red background circle to match the film’s scene.
11. “To Infinity and Beyond” with Toy Rocket
Design the phrase with a retro-style rocket flying upward. Use curved lettering that wraps around the rocket’s path, and add small stars or planets for a space feel. Bright reds, blues, and yellows bring the Toy Story vibe to life.

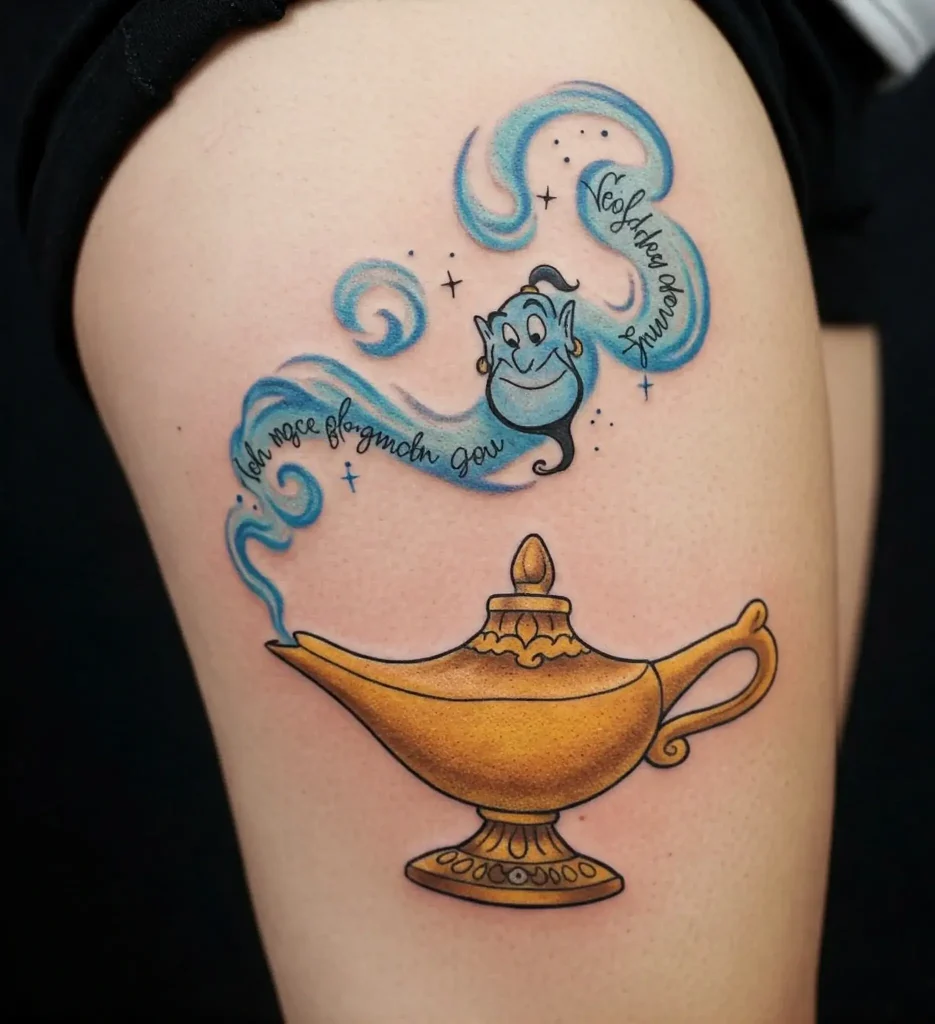
12. Aladdin’s Magic Lamp
Illustrate the golden lamp with smoke curling out, forming the Genie or a swirl of stars. Use gold and blue ink for contrast. The swirling smoke can be done with dotwork, and you can even shape it into a quote or figure.