Have you ever wanted to create a tattoo design but stopped because you didn’t have transfer paper? You’re not alone.
Many beginners struggle with this, and it can feel frustrating when you’re excited to start but don’t have the right tools.
The good news is that you can still make a clean, usable stencil using simple items at home.
Learning how to make a tattoo stencil without transfer paper is easier than you think, and you don’t need any fancy equipment to get started.
What Materials Do You Need to Make a Tattoo Stencil Without Transfer Paper?
To make a stencil without transfer paper, you only need basic items you might already have at home.
These include thin regular paper, a sharp pencil, ballpoint pen, deodorant stick (alcohol-free), petroleum jelly, and scissors.
Many people also use tracing paper if they want a cleaner outline before transferring it to the skin.
Make sure everything you use is clean and never reuse pens or tools on multiple people.
Simple materials can still produce a crisp stencil if handled correctly. Starting with the right supplies makes the whole process easier and safer.
How Can You Create a Safe and Clear Tattoo Stencil at Home Using Everyday Items?
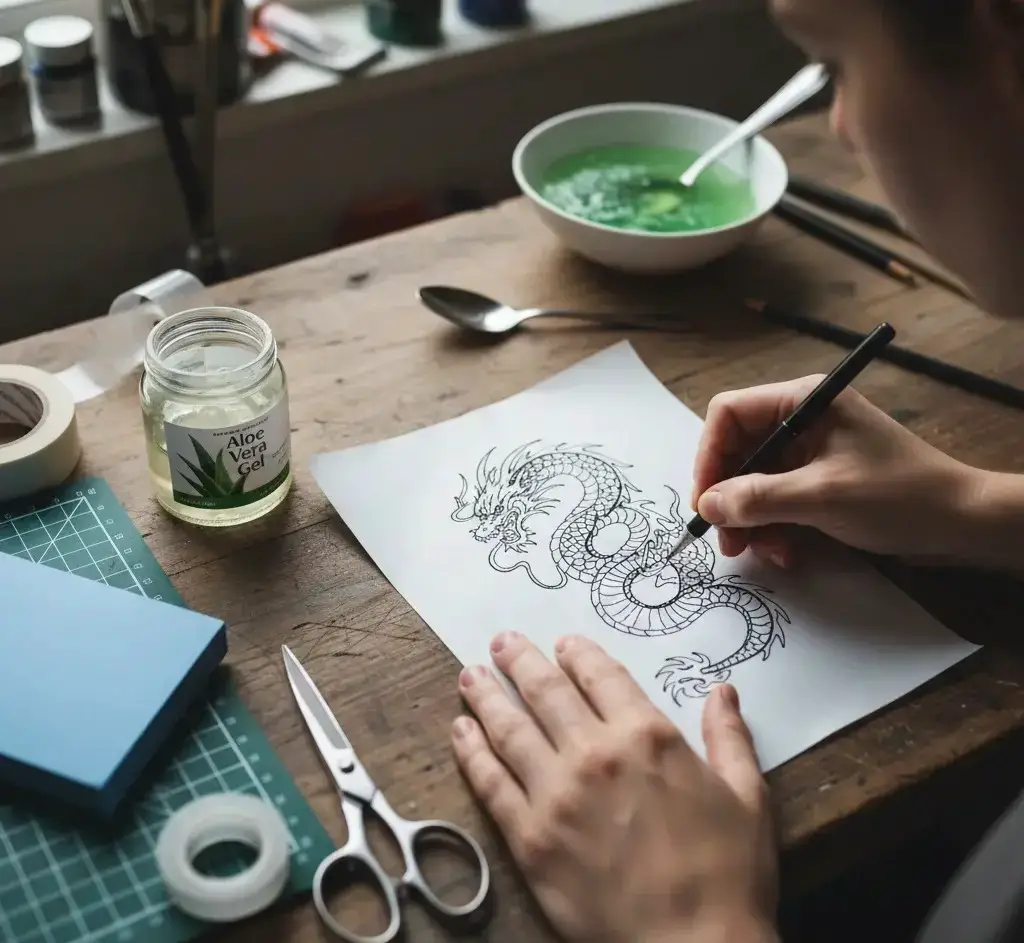
A safe and clear stencil begins with clean tools and a smooth surface to draw on. Start by washing your hands and wiping down your workspace to avoid bacteria.
Place your design on regular paper and trace it with a pencil until the lines become darker.
Then flip the page over and shade the back lightly with the same pencil; this creates a makeshift carbon layer.
When you press this paper onto the skin, the pencil shading helps the outline transfer. Even everyday materials can create crisp results when you follow proper hygiene and careful pressure.
What Steps Should You Follow to Draw and Prepare a Stencil Without Transfer Paper?
Start by sketching your design clearly on clean paper using a pencil or black pen. Make sure your lines are bold, so they transfer well.
Next, flip the paper over and rub pencil graphite across the entire backside of the design area. After preparing the skin with deodorant or a stencil solution, place the paper face-up onto the skin and hold it still.
Press gently but firmly along each line, making sure not to shift the page. When you peel it off, you should see a clear outline ready for tattooing.
How Do You Transfer a Homemade Tattoo Stencil Onto Skin Without Using Traditional Transfer Sheets?
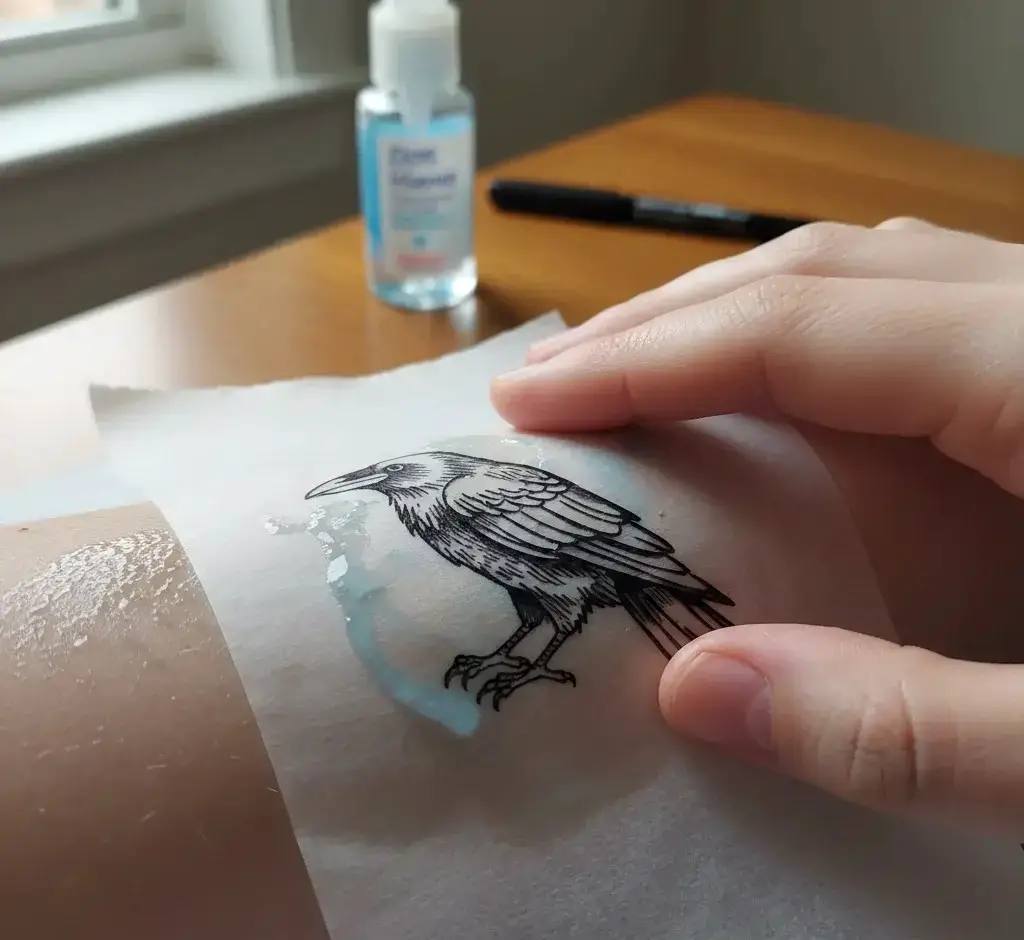
Transferring without transfer paper relies on using deodorant or stencil gel to create a sticky surface on the skin.
Apply a thin layer of deodorant and wait a few seconds for it to get slightly tacky. Place the prepared stencil on the skin, making sure the graphite-covered backside faces down.
Hold the paper firmly and follow the lines using steady pressure. Avoid dragging the paper because it can smudge the design.
Once you peel it back, allow the stencil to set for a few minutes before tattooing or tracing.
What Common Mistakes Happen When Making a Tattoo Stencil Without Transfer Paper, and How Can You Avoid Them?
Many beginners apply too much deodorant, which causes slipping and smudging. Try using a thin, even layer instead.
Another mistake is pressing too lightly, resulting in faint lines that fade quickly. You also want to avoid shifting the paper while tracing because even a slight move can distort the design.
Using dirty tools or touching the skin repeatedly can contaminate the area.
Always prepare your paper properly with enough graphite so your lines transfer clearly. Simple adjustments make a big difference in stencil quality.
What Safety Risks Should You Know Before Making a Tattoo Stencil at Home?
One of the biggest risks is infection caused by poor hygiene or dirty tools. If you reuse pens, allow pets near your workspace, or touch the skin frequently, bacteria can enter the area.
Another risk is skin irritation from deodorant chemicals or harsh rubbing. Homemade stencils also tend to fade faster, making beginners press harder during tattooing, which can damage the skin.
Always clean the surface with alcohol before placing the stencil. Understanding these risks helps you work more safely and confidently.
Can Homemade Tattoo Stencils Cause Skin Problems, and What Symptoms Should You Watch Out For?
Homemade stencils can sometimes cause mild irritation, redness, or itching if the skin is sensitive.
Watch for symptoms like small bumps, swelling, or a warm sensation, which might indicate a reaction. If you used a scented deodorant, reactions may be stronger.
Always remove the stencil and clean the skin if you notice pain or burning.
If symptoms worsen or spread, it’s important to stop and rest the skin. Spot-testing your products before stencil making can prevent most issues.
How Can You Make Your Homemade Tattoo Stencil Last Longer on the Skin During Tattooing?
To make your stencil last longer, let it fully dry before starting any tattooing. Rushing this step can cause smearing once gloves touch the skin.
Use very light touches while wiping excess ink during the tattoo process. Apply a thin layer of petroleum jelly to protect the lines without making them slip.
If you sweat easily, keep the area cool before applying the stencil. The longer the stencil holds, the easier it is to follow the design accurately.
What Aftercare Steps Should You Follow if Your Homemade Stencil Irritates or Redden the Skin?
If your skin becomes irritated, wash the area gently with mild soap and cool water. Avoid scrubbing because this can worsen the reaction.
Apply a soothing product like aloe gel or unscented moisturizer to calm redness. Keep the area clean and avoid scratching to prevent infection.
If irritation happened before tattooing, wait a day or two before attempting again.
For continued redness or swelling, consider stopping the process completely. Treating irritation early protects your skin from long-term damage.
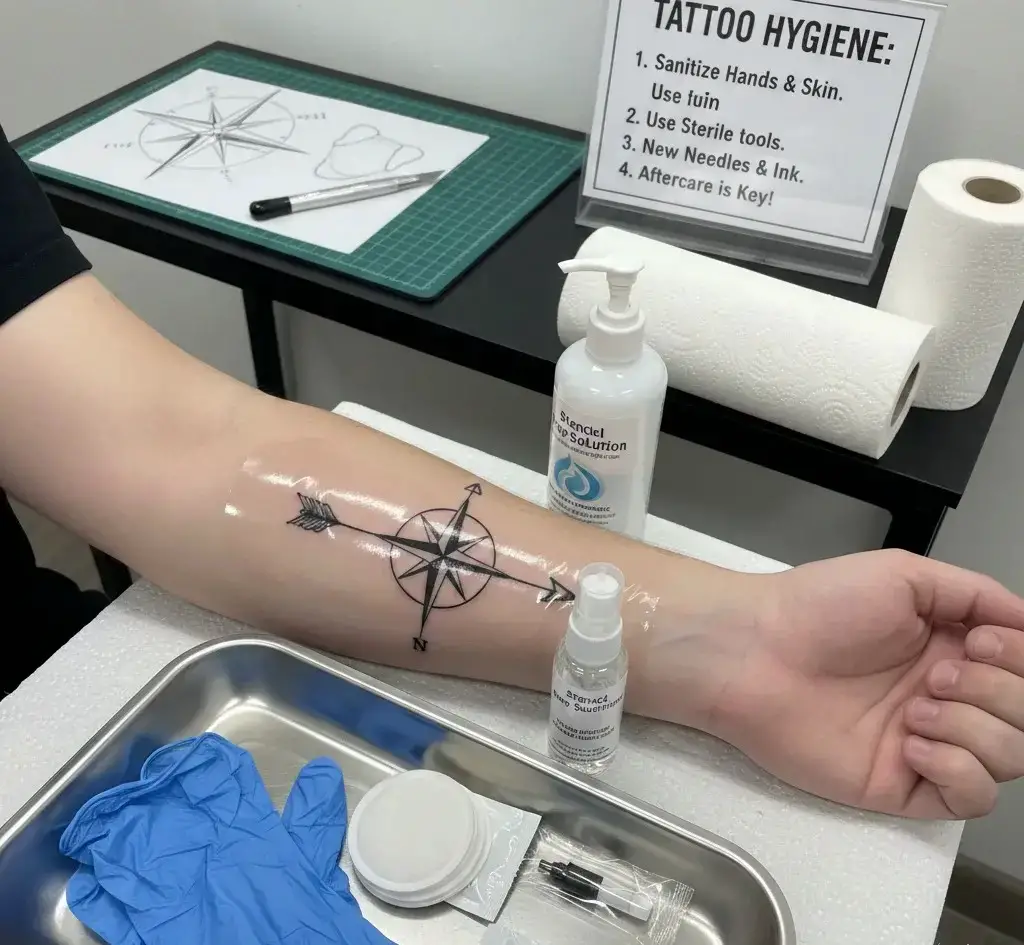
What Are the Best Hygiene Practices When Making a Tattoo Stencil Without Professional Tools?
Always start by washing your hands and putting on clean gloves. Wipe the skin with rubbing alcohol before applying any product.
Use fresh paper, clean pens, and separate tools for every person you work on. Avoid blowing on the stencil or touching it repeatedly.
Disinfect your table and tools before and after use. Even if you’re practicing at home, follow studio-level cleanliness to protect yourself from infections.
Good hygiene turns a simple DIY method into a safer experience.
How Do Professional Artists Create Stencils, and What Can You Learn From Their Techniques?
Professional artists use thermal transfer paper and stencil machines that create crisp outlines, but the techniques behind it are still helpful for DIY users.
They focus on bold lines, smooth tracing, and balanced pressure to avoid uneven marks.
Artists also prepare the skin carefully with alcohol and stencil gels that help the design stick longer.
They work slowly to avoid smearing and allow the stencil to fully set before tattooing. Learning these habits helps beginners create cleaner results even without professional tools.
What Alternatives Can You Use If You Don’t Have Transfer Paper or Stencil Gel?
You can use homemade graphite shading, deodorant sticks, petroleum jelly, and even makeup setting spray in some cases.
Some artists use tracing paper instead of regular paper to get sharper outlines. A ballpoint pen can also serve as a direct-draw tool on the skin, but this is riskier for beginners.
If you don’t have stencil gel, a slightly tacky deodorant works well. There are many safe alternatives as long as you follow proper hygiene and avoid scented or harsh products.
How Do You Fix a Blurry or Faded Stencil Made Without Transfer Paper?
A blurry stencil usually means too much deodorant or pressure was used. Clean the area with alcohol and start over with a thinner layer.
If the stencil fades quickly, allow more drying time before touching it or tattooing. You can also redraw missing lines with a sterile skin-safe marker.
Make sure the paper doesn’t slip as you transfer it. Small adjustments like these make the design clearer and easier to follow.
What Are the Healing Stages After Using a Homemade Tattoo Stencil, and What Is Considered Normal?
The healing stages remain the same regardless of stencil type: redness, slight swelling, scabbing, peeling, and settling.
Mild redness shortly after the stencil is normal. Once the tattoo is complete, the area may feel warm or sensitive for a day or two.
Light scabs form within a few days and peel off naturally.
As long as the tattoo stays clean and you avoid scratching, healing should progress smoothly. Only severe pain, pus, or unusual colors signal a problem.
What Signs Show That a Tattoo Is Not Healing Properly After Using a DIY Stencil?
If the tattoo develops thick yellow scabs, strong odors, or oozing, this could mean infection.
Excessive swelling, spreading redness, or sharp pain are also concerning signs. Lines that blur quickly may indicate too much pressure during tattooing rather than stencil issues, but they still require care.
Any leaking fluids or unusual warmth should be checked by a professional. Early detection prevents long-term damage and helps you treat the problem fast.
How Can You Prevent Infection When Using a Homemade Stencil for a Tattoo?
Disinfection is the key to preventing infections. Clean your hands, tools, table, and skin before you begin.
Use only fresh paper and never reuse pens or markers that touched someone else’s skin. Wear gloves and change them if you touch anything unclean.
Make sure the stencil area is fully dry before tattooing to avoid spreading bacteria. Practicing good studio habits at home keeps the process safer and minimizes risks.
What Expert Tips Can Help Beginners Make a Clean and Accurate Tattoo Stencil Without Transfer Paper?
Experts recommend bold lines, slow tracing, and firm pressure when transferring. Let the stencil sit on the skin longer before peeling it off.
Allow the design to dry at least 10 minutes before tattooing so it doesn’t smear. Use unscented deodorant only, and apply a thin layer for better grip.
Always work in a clean area with good lighting. These simple habits make a huge difference in the final result.
Is It Safe for Beginners to Tattoo Using a Stencil Made Without Transfer Paper?
It can be safe if you’re practicing on fake skin, but extra caution is required on real skin.
Beginners may not understand proper hygiene, needle depth, or pressure, which can lead to injury. Homemade stencils sometimes fade faster, causing confusion during tattooing.
If you’re new, it’s better to practice on artificial skin first. Using proper safety methods helps prevent infections and scarring for real tattoos.
How Can You Reduce Smudging When Tattooing Over a Homemade Stencil?
Smudging usually happens when the stencil isn’t fully dry. Wait at least 10–15 minutes before starting.
During tattooing, wipe gently and avoid dragging your cloth across the design. Light dabs work better than full wipes.
Keep your gloves clean and avoid touching the stencil repeatedly. Use minimal petroleum jelly to protect the stencil without making the skin slippery.
Should You Practice on Fake Skin Before Using a DIY Stencil on Real Skin—and Why?
Fake skin allows you to learn pressure control and practice lining without harming anyone. You can test your homemade stencil methods and see how long the design holds.
Mistakes are easier to fix when you’re practicing, and you gain confidence before working on real skin.
Practicing also helps you understand how ink spreads and how to wipe without smudging. It’s a safe way to improve your skills before moving to real tattoos.